Showing posts with label Bath. Show all posts

Thursday, December 2, 2010

Full Guest Bathroom Before

Our full guest bathroom upstairs has been in desperate need of some updates.  However, it had been low on the priority list because we never use it, and we have guests only a handful of times throughout the year.  All that changed when we found out we were expecting.  This bathroom become more of a priority since our little one would be using this bathroom in the near future, and our more frequent guests would be too.

Below are some pictures of what we were working with...... A combo of brass Hollywood lighting, and polished silver faucets.


 The flooring in this bathroom left a lot to be desired.  I do not know who in their right mind would like carpeting in their bathroom, but the people that bought our house gave us the best of both worlds when it came to flooring.... Half carpet/Half tile.... Awesome, right?????  Not so much....
We decided that we wanted to make some big changes in this room, but we wanted to be very cost sensitive since this bathroom would soon be a kid bathroom (and we all know how hard they are on everything as they grow up).  We decided we wanted to avoid anything too kiddie since this bathroom would also be used by guests too.

Therefore, we decided to invest in new lighting, new tile flooring, new paint, and possibly some new accessories.   My next post will showcase the transformation, but here is a teaser picture......

Sunday, September 5, 2010

Master Bath Reno: Part 8- Towel Bar Progress....

Let's just say, I was hopeful to have more to update you on this week than towel bars, but let's just say I am starting to slow down now that I have entered my third trimester of pregnancy.  At any rate, I don't want to rush through finishing the space so it may take a little longer to accessorize than I thought..... As I weed through figuring out how to complete my space, let me remind you of the desperate towel bars we once had in our bath....

It is a bit embarassing to admit this, but these towel bars have been hanging out of the wall for at least nine months.  Because I knew I would be replacing them in the future with brushed nickel updates, I just couldn't bring myself to fix them.... Therefore, they just sort literally hung around..... Until now.... I spent about a hour replacing them, and let me just say I am so excited to have towel bars that are brushed nickel that do not hang out of the wall...I went with the Moen Glenshire towel bar line.  They were on sale for 20% off at Menards last week resulting in a bit of savings.  The template that comes with these towel bars is wonderful.  It makes installing the hardware a cinch....
Before
After
The towel ring took less than 10 minutes to put up... Easy Peasy, and boy is it conventient to have a place to hang your towel again.

Installing the towel bars by the shower took a bit more time.  I needed a place to hang three towels.  Of course I require two towels myself, and my husband needs a place for his.  Before, we used to have a towel bar on our glass shower door, but we went for a more seamless option without a bar.  Therefore, the Moen Glenshire double towel bar and single towel bar fit perfectly (well almost perfectly).  You see, the double towel bar comes in a 24 inch length, but my wall space would not allow for this which meant I needed to cut the bars down to size.  I went with the 18 inch length as the single towel bar was already this size, and the template that came with bars would be perfect for this (no customization needed).  Therefore, I marked my rods for 18 inches, got the hack saw out, and cut them to size.  I must admit, the cutting took a bit more time than I thought it would, but I think I got both rods cut in about 20 minutes or so.  Once I got the rods cut, then it was time to get the templates on the wall.
After drilling a few holes in the wall, I was able to get the hardware up.
I am just over the moon with the completion of this project.  Before the update, we only have one towel bar on this wall, and the other one was across the room.  It is so nice and convenient to have our towels an arm length away.  Makes showering that much easier...

Sunday, August 29, 2010

Master Bath Reno: Part 7-Paint Selection

The master bath is really coming together this week.  Great advancements were made with selecting our new paint color, and painting the room.  I chose to move forward with Benjamin Moore's Wedgewood Gray HC-146.  I wanted a moody blue gray with a bit of depth to it so that the room would not be washed out by all the white cabinets, white doors, white molding, white cermanic tile, and then now the newly installed creamy/tannish  marble flooring.  I went with an eggshell finish in the Eco-Spec line as this is their no VOC paint.  The ceiling is painted Benjamin Moore Decorator's White in eggshell (Eco-Spec), and the molding is Benjamin Moore Decorator's White in semi-gloss (Regal line).
Before we could get the paint on the wall, the walls needed quite a bit of work.  The previous owners had painted this room themselves, and let's just say they did not give the TLC it needed.  Dried paint drips were plentiful as well as brush marks.  Therefore, we spent lots of time sanding and prepping the walls.  There were also the huge holes in the walls where the old brass Hollywood lights were located.  So after about four hours of prepping the walls, we were able to paint. 
Before
After

I hope the above photos curb your enthusiasm for the final reveal coming in the next week.  I am just so excited to finally be able to use this bathroom again.  It has been about two weeks of showering in the basement bathroom which isn't all bad, but that extra flight a stairs when you are pregnant can be a bit annoying at times.

Paint Colors: Wall- Benjamin Moore- Wedgewood Gray eggshell finish-Eco Spec; Ceiling- Benjamin Moore- Decorator's White eggshell finish- Eco Spec; Molding- Benjamin Moore- Decorator's White semi-gloss- Regal line.

Saturday, August 28, 2010

Master Bath Reno- Part 6- Light Selection

Good bye Hollywood...... Hello engery star lighting!  I am so excited to say sahari to the old brass Hollywood lights that just about everyone has in at least one of their bathrooms.  Hollywood served it's purpose, but everything has a shelf life, and it's life has come to a close.                                                              Before
Close-up
Choosing a replacement lighting option was a bit more challenging than I thought it was going to be.  I searched all the local hardware stores, and your usual suspects online.  I wanted to choose something that had an Energy Star rating with straight lines that was well priced.  Luckily, after about my third week of shopping, I stumbled upon the below option at Lowe's.  It is one of their new options on the floor, and I was excited to find two available for purchase.
Installing the lights were relatively easy once we were able to center the lights on the wall.  The challenge part came in when we needed to repair the giant holes in the walls left by where Hollywood had left it's mark.  Lots of spackling and sanding involved, but it was well worth it.
The bathroom project is coming together quickly.... Look for an update on paint this weekend. :)

Sunday, August 22, 2010

Master Bath Reno- Part 5- Marble Flooring

We made great progress with our master bath this week.  The awful carpet is a thing of the past, and the gross tile in the toilet room is out.  Yeah!  Below is the how we got the job complete.....
Before
After (with Durock down)
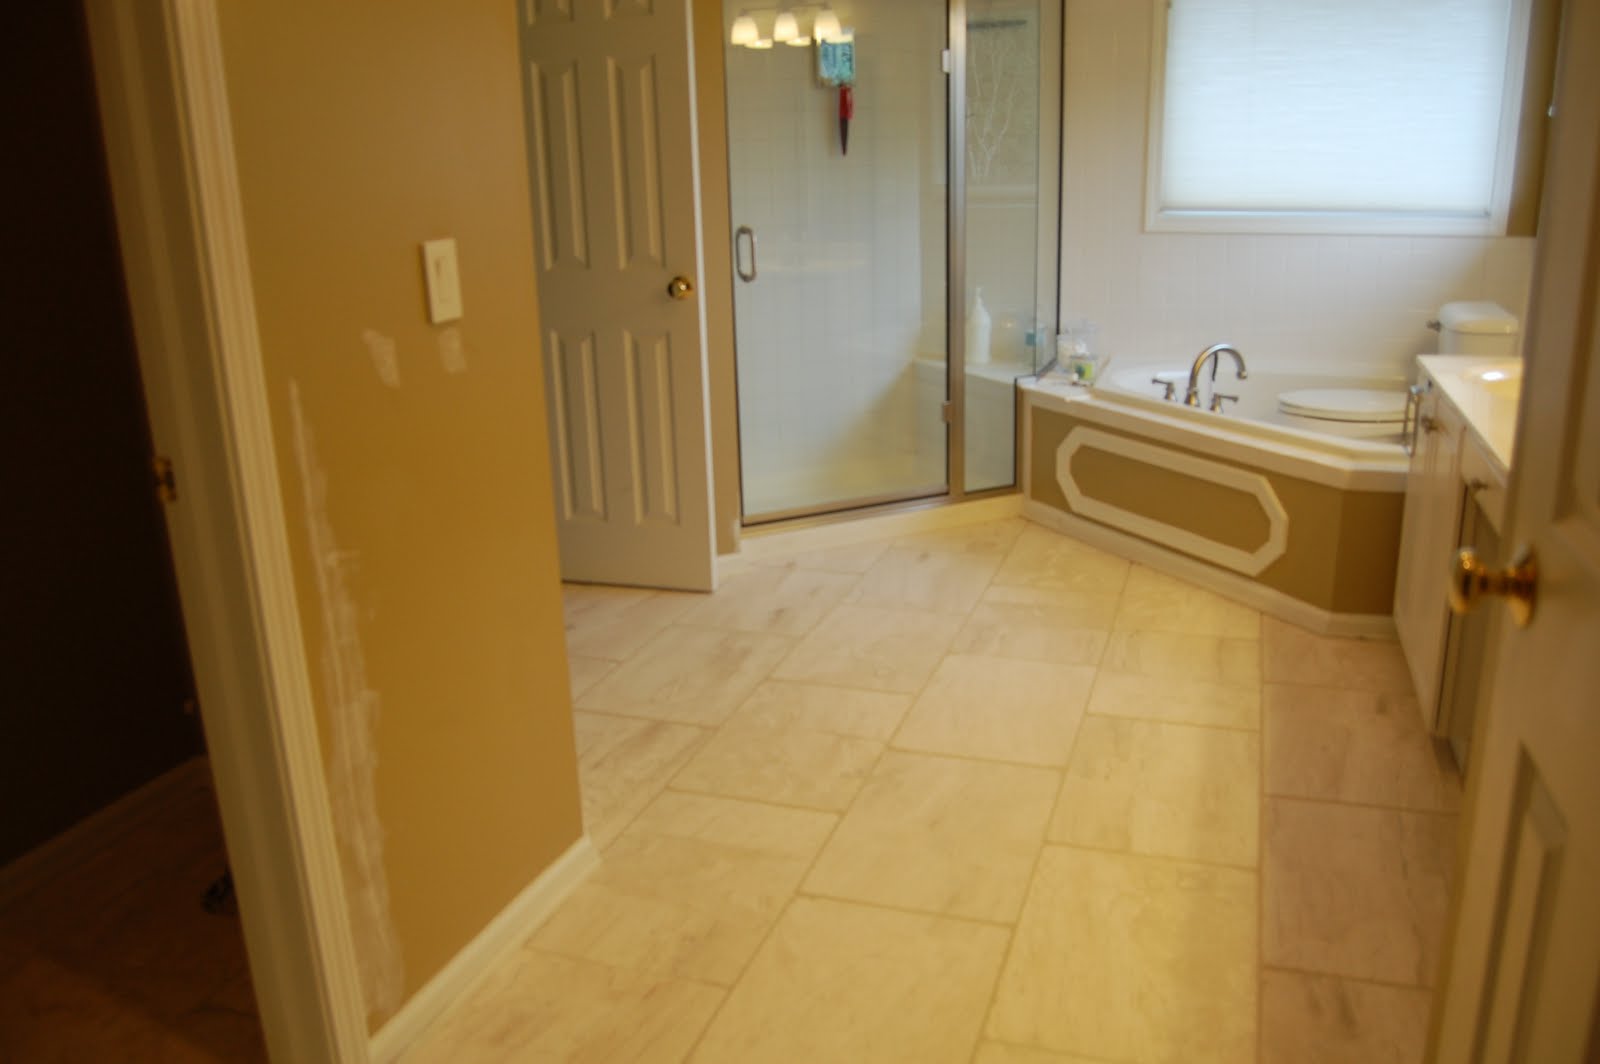
We selected Turkish marble in a 16 in x 24 in size for our master bathroom.  In the spirit of working with some of the existing items in the bath, we needed to go with a pattern/color combo that was neutral that would work with our off-white fiber glass shower bottom, but would also work with our more white with gray specks countertops.  Of course, there was all the white tile to consider that surrounded the shower and bath tub.   Our bath is about 135 square feet, but there are a lot of crazy angles in the bathroom.  There were very few tiles that did not need to be cut to size. 

The Turkish marble color scheme is a milky cream color with grays and tans swirled throughout.  It is not polished which makes for great traction which is very important in a room where it is inevitable that water will be splashed on the floor from time to time.

We did hire our for the installation for this project since the bath is anything, but a standard size.  Below you will see a picture of the marble in, but not grouted.  It took our contractor one day to get the marble laid.  We choose to have the marble laid in a brick pattern. 
Here is another angle without the grout.
Our particular marble tile needed to be sealed before the floor was grouted.  The contractor used Aqua Mix Sealers Choice Gold.  This product claims to be low VOC, but it left quite an odor behind once applied for a low VOC product.  After airing the space out for a few hours, the flumes were gone, but we were quite disappointed with the stench it left behind for those few first hours.
View from the Master Bedroom with birch grout
Another view from the Master Bedroom (grouted)
Closer look at the Marble Brick Pattern
Angle from our Master Closet
So there you have it, after 2 plus years, the nasty carpet is gone, and we could not be happier with our marble selection.  Next on tap is paint..... Stay tuned!

I am linking up to the following parties.....

Saturday, August 21, 2010

Master Bath Inspiration

I thought it was about time that I share with you my inspiration for our master bath. As you know, this has been a project long in the making. Since the day we moved into our house, our master bath needed some work. However, I was indimated by all that needed to be done so I focused on some of the "easier" transformations on the first floor. Well, the time has come, and the master bath is getting addressed.
So far I have shared with you our new shower door transformation, and the hardware choices we have made. Although the picture below has polished chrome, I went with brushed nickel. What I love about this inspiration photos is that it feels so spa-like, and relaxing to me. Just what you want for a master bath.... A little piece of heaven to relax in.
Future posts I will share with you the hardware installation, tile installation, lighting installation, paint, and finally the accessories.  I am really liking the art that Pottery Barn has showcased here.  I am thinking of trying a little "diy" project to see if I can get this look.

Thursday, July 29, 2010

Master Bath Reno: Part 4- Hardware Selection

Our bathroom was in desperate need of updated shower and roman tub trim.  We still had the builder grade versions of both, and the roman tub trim has been flaking it's brassy metal pieces all over the place for a few months. 
The shower trim was funtional, but just did not look great especially once the beautiful brushed nickel shower door was in place.
Therefore, I have been on the lookout for some replacement pieces.  I had consulted with our favorite plumber since my husband and I are not well versed in plumbing.  Our plumber advised us to stay with Delta pieces as we were replacing Delta pieces, and I guess this would ensure that everything would fit correctly.  I am not sure if this is 100% accurate, but since we ended up special ordering the pieces, I went with his advice.

I searched Delta's website for some time.  I wanted to select replacement pieces that were functional, and not fussy.  Initially I was planning on selecting the Windemere collection (see pic below) as we already had these faucets at our sinks in brushed nickel, but I just did not like the the handle on these sinks.  They were okay enough, but they just were not my style (see below), and I wanted something I loved for my master bath.  The Delta gods helped me along as they do not offer all of the pieces I needed in the brushed nickel finish I required.  Therefore, I had a big decision: 1) replace the shower and trim pieces with a different collection than the faucets or 2) start anew......

After thoughtful consideration, I decided to start anew, and get new faucets too.  My decision was highly influenced by the Two-Handle Widespread Lavatory Faucet option in the Orleans Collection.  I just loved it, and kept coming back to it.  I had contemplated purchasing the Orleans shower and roman tub trim, and leaving the faucets as is, but I knew this would drive me nuts.  I just love the lines, and think it will be perfect in our bath.  I choose the Brillance Stainless which is indestructable (the finish flaking off with be a thing of the past).
Here is the corresponding Orleans Roman tub trim:
Here is the corresponding Orleans shower trim:
As I mentioned above, we needed to special order our pieces as they were not available in stock in our area.  It will take about a week to a week and a half before they arrive resulting in me daydreaming on what the final product will look like in my bath.  I am just tickled with my selections.

Stay tuned for after pictures......

Sunday, July 25, 2010

Master Bath Reno- Part 3- New Glass Shower Door

Here is the before shot:
Here is the in progress shot:
Once we had the tile fixed in the shower, it was time to select the door for our shower.  Initally we checked out the big box stores, but we quickly learned that our door needs were as custom as shower enclosures come, and we needed to go with a professional.

We also learned that we were limited to a semi-frameless option or a framed door option because we had a fiberglass shower pan (the frameless options were too heavy for our pan). We had contemplated gutting the shower upon learning this, and starting anew, but we did not want to invest the money in this option. Outside of the one broken tile that needed to be replaced, the surrounding tile was holding up, and we just were not ready to make that sort of investment. Therefore, it was a no brainer for us....Work with what we have and save the money on this part of the project.

We decided to go the semi-frameless route because it gave us a more high-end look (although it was a bit pricier). We debated between a chrome and brushed nickel finish, but in the end, we went with the brushed nickel finish because we thought it looked more upscale than the chrome option (this added a bit of cost, but surprisingly, not much). From here, we decided to go with a door that opened into the bathroom rather than have two sliding glass doors like we had with our brass option. Since the previous doors ended up coming off the track all the time, this was a wonderful improvement. Also, our shower door area was a bit narrow where the doors are allowing only 40 inches for the doors. If we went with a two door option, the door opening would be narrow (our previous ones allowed for an 18 inch clearance) which was not comfortable for my broad shoulder husband that needed to enter the shower at an angle to avoid banging his shoulders against the frame. When all was said and done, we ended up selecting to have our shower door be 34 inches wide which allows for plenty of room to get in and out of the shower.

The other big consideration we contemplated was the height of the shower door frame. The brass frame was low at about 68 inches. This was too low for our needs as my husband is a six footer which meant he had to duck to get into the shower door or risk hitting his head on the frame. We selected to go with an 80 inch door height, and we are very happy with this choice.
Angle 2
We are very pleased with our new shower enclosure. Showering in our home is no longer a life threatening event......

Next up on the bathroom reno project: hardware fixture selection..... Stay tuned.

Sunday, July 18, 2010

Master Bath Reno: Part 2- Out with the door.....

Our first step in our bathroom remodel was to address the brass shower door.  It needed to be replace because not only was it ugly, it was also hazardous to our health.  After getting stuck in the shower a few times (the sliding doors no longer were on the track most of the time), my husband and I both decided it was time to replace the door.
Because we decided to replace the door, we knew this was the time to replace the broken tile in the shower as well.  We toyed with the idea of retiling the whole shower with something different, but the existing tiles everywhere else in the shower/tub area were in great shape.  Of course cost factored into our decision as well so we decided to stick with the more economical repair tile plan.  Unfortunately, the previous owners did not leave any extra tiles for replacement so it was a bit of a struggle to find the right color of off-white tile to match our aged existing tile.  Therefore, we proceeded with having the door removed before we selected which tile option to proceed with for the project.
We contracted out for this project because our shower opening was a custom size.  The contractor we went with also did tile repair so we had him assist with replacing the tile too which was very convenient for us.

This is what the shower area looked like with the brass door removed.... Already an improvement!
Below is what the broken tile area looked like once the contractor removed the offending tiles.  As you can see, some of the tile backing where the wall is missing possibly answered the question why the tile broken in the first place.
The contractor fixed this error, and we went about selecting our tile replacement option.  I can't recall the color or vendor of tile we went with, but it was a 95% match to what we had existing in the shower.
As you can see above, the new tile blends in well with the existing tile.  Happy dance!  You probably also notice that we needed to do a bit of drywall repair outside of the shower on the corner as water leaked through the broken half caulked tile.  The wall obviously doesn't look great yet, but it will in time when the bathroom gets it's new paint color.

My next post will detail how we decided to select the door for the shower enclosure, and an updated pic of how it looks now.

Friday, July 16, 2010

Master Bath Renovation Part 1

Our master bath renovation project has been on the wish list since we purchased our home. From the get go, we recognized that our bath had lots of potential. We loved the size and footprint of the bathroom, but there were quite a few things not to love.

Number 1- the half carpet/half tile floor job. You see, our house was built in the late 90s, and I guess carpet in the bathroom was a great idea then. When we purchased our home, we replaced all the carpet in the house, but we left the original carpet in the baths in the hopes we would replace it with tile. Then, we started researching tile, and realized we were not ready to commitment to a particular tile option. Therefore, other projects took priority, and the carpet has stayed put for 2 years and counting. Not for long.....
Number 2- We were not fans of all the lovely shiny brass hardware and fixtures.  Not only did we want to update the finish, but most of the towel bars began to fall out of the drywall after a few months.  We didn't bother with fixing them because we knew we wanted to replace them.  However, in decision got the best of us..... Were we going to to commitment to brushed nickel or polished nickel......  Not anymore......

Number 3- Our brass shower door needed to go. Not only was it ugly, it was no longer functional. After a year of home ownership, the metal that held the doors on the sliding component bent causing the doors not to slide and get stuck. This was obviously a major hazard that needed to be addressed.  The other annoying items were that the frame bar on the top was positioned low so my six foot plus husband had to duck to get in and out of the shower.  To add insult to injury, the doors were only 18 inches wide which means he also had to enter and exit at an angle because otherwise he would hit his shoulders against the frame.
Number 4- The caulked broken tile in the shower got on my last nerve. I didn't notice when we first bought the house, but after months of showering in our shower, I got annoyed having to look at the broken tile..... Easy enough to fix if replacing the door.
Number 5- The paint color was just alright, but we wanted a more spa like feel.  Easy enough fix here too!
 
So in the coming weeks, you will witness how we transform this drab bathroom into something beautiful.  I can't wait.... It has been a long time coming.  Stay tuned!