Showing posts with label Outdoors. Show all posts

Monday, October 11, 2010

Falling for Fall.....

The Midwest has been experiencing temperatures that are more inline with summer than fall.  In Indiana, we haven't had rain in weeks.  Most people's grass is burnt, and most plants have given up, and are just dormant.  However, the fall foilage is starting to fall, and it brings about my favorite time of year: fall.  To get into the fall spirit, I planted some mums in pots for our porch.  I thought I took some pics as I completed the process, but that wasn't the case.  Therefore, all I have to share are a before and after.
Before
After
 Close-up of Mums... Yummy Yellow color
 Just beautiful Peachy Flowers

 Beautiful Tree in front of our Home
Hopefully the temps will start to drop in the coming days.  Today's high was 87 degrees which set another record.  I am looking forward to some 50 degree weather.... Cross your fingers we will get it.

Sunday, September 12, 2010

Rose of Sharon Update.....

Since we are nearing the end of summer, I wanted to share a quick update on my Rose of Sharon bushes I planted last year.  You may remember them from this post Rose of Sharon Post.  I got them on major clearance at Lowe's and I planted them in the hopes of stopping teenagers from walking through our yard last October, and I must say it worked.
The bushes have really grown in this summer despite the drought Indiana has been suffering.
Close-Up
It's amazing how many blooms the bushes have had the last few weeks.  The bushes are looking a bit leggy, and I will trim them up in a few weeks once the blooms are done.  I am so happy they have grown in so well. 

Wednesday, September 8, 2010

Outdoor Lighting Update.....

Let's face it.... Our outdoor lighting had seen better days.  After 13 years of 365 days out in the elements, the brass fixtures had begun to wear away.  In some places, the finish on the lights were blackened. 
Close-up Before
Side of Garage Before
Therefore, last weekend, the time came to update the jewelry on the house.  It took some time to find a replacement.  We wanted to find an option that would allow for the lightbulbs to be easily changed.  The old brass model were a bit difficult becasue there was a piece you had to unscrew two screws before you could access the lightbulbs.  Also, because I have a height disadvantage, I always need a chair or ladder to access. 
On a trip to Menard's, we found the above option.  The look was right on, and the lightbulb access was through the bottom of the light.  They were also a decent price at about $35 a piece (this was important since we needed four for the garage, and one for our front porch).  Luckily, we were able to find the five lights we needed: Score!

Once we got home, my husband got to installing them under the direction of our neighbor.  This was my husband's first go around with installing lights, and he completed like a champ.  After about 2.5 hours, all the lights were up.  They are now ready for their close-ups.....
Now, that is so much better.  Instant update.... It is so refreshing to pull into the garage now, and this wonderful bling hanging from the house.

Friday, January 1, 2010

Maintenance Free

Today I was reminenscing a bit about all the yard projects we completed this past summer around our casa with a few friends.  Upon recalling all the hardwork, I realized I never posted about one of our major backbreaking projects.  So here we go.... try to remember what warm weather feels like, and let's talk about creating an almost maintenance free space.

As you can see below, we had a very large flowerbed on the southside of our house by our driveway that was filled to the brim with numerous perennials.  This bed provided many beautiful flowers, but it also provided lots of soil for numerous weeds to grow.  Almost every other day, I was going outside to weed which is not a fun task when you are allegeric to almost everything outdoors.

Therefore, in an effort to create more maintenance free spaces on our property, my husband and I dug up all the plants in the above space.  We have a little bit of nice topsoil with lots of clay soil underneath, so we waited to complete the removal process until we had a few days of rain.  This was a great idea because our shovels cut through the soil much like a knife cuts through hot butter.  It was pure magic, and made the process go so much quicker.  It took about 3 hours to dig all those flowers up, but we got it done.
                            
We then picked out all the rocks we could find in the soil.  Initially we were going to try to seed the area rather than using sod, but after having seeded so many areas of our yard this year, we opted for sod (instant gradification was needed).  We then decided that since we removed all the plants ourselves (and also because I am allergic to grass) that we would contract out for the sod.  Therefore, our contractors rototilled the soil to prepare for the sod, and then sodded it on our behalf.

After lots of water (water is super important to sod rooting; I can't emphasis it enough), we are happy to report that our sod rooted well to the ground, and for the most part, blends in well with the surrounding grass.  We are super excited to have one less area to weed next summer which will provide more time for enjoying fun warm weather activities.

I definitely think the grass is greener on our side of the property line. :)

Wednesday, October 7, 2009

Rose of Privacy or Rose of Sharon????

Many of you know out there that my husband and I were very surprised with all the landscaping we inherited from the previous owners. Let's just say that the snow did a number on hiding all the fun flowers of all kinds, cactus, and bushes placed randomly throughout the yard (literally). To say we were overwhelmed would be an understand statement. As mentioned in a few of my other posts, we have spent the first 18 months of home ownership digging our way out of the craziness known as our yard. We are FINALLY beginning to see the light to the tunnel of a more low maintenance yard. THANK GOODNESS!

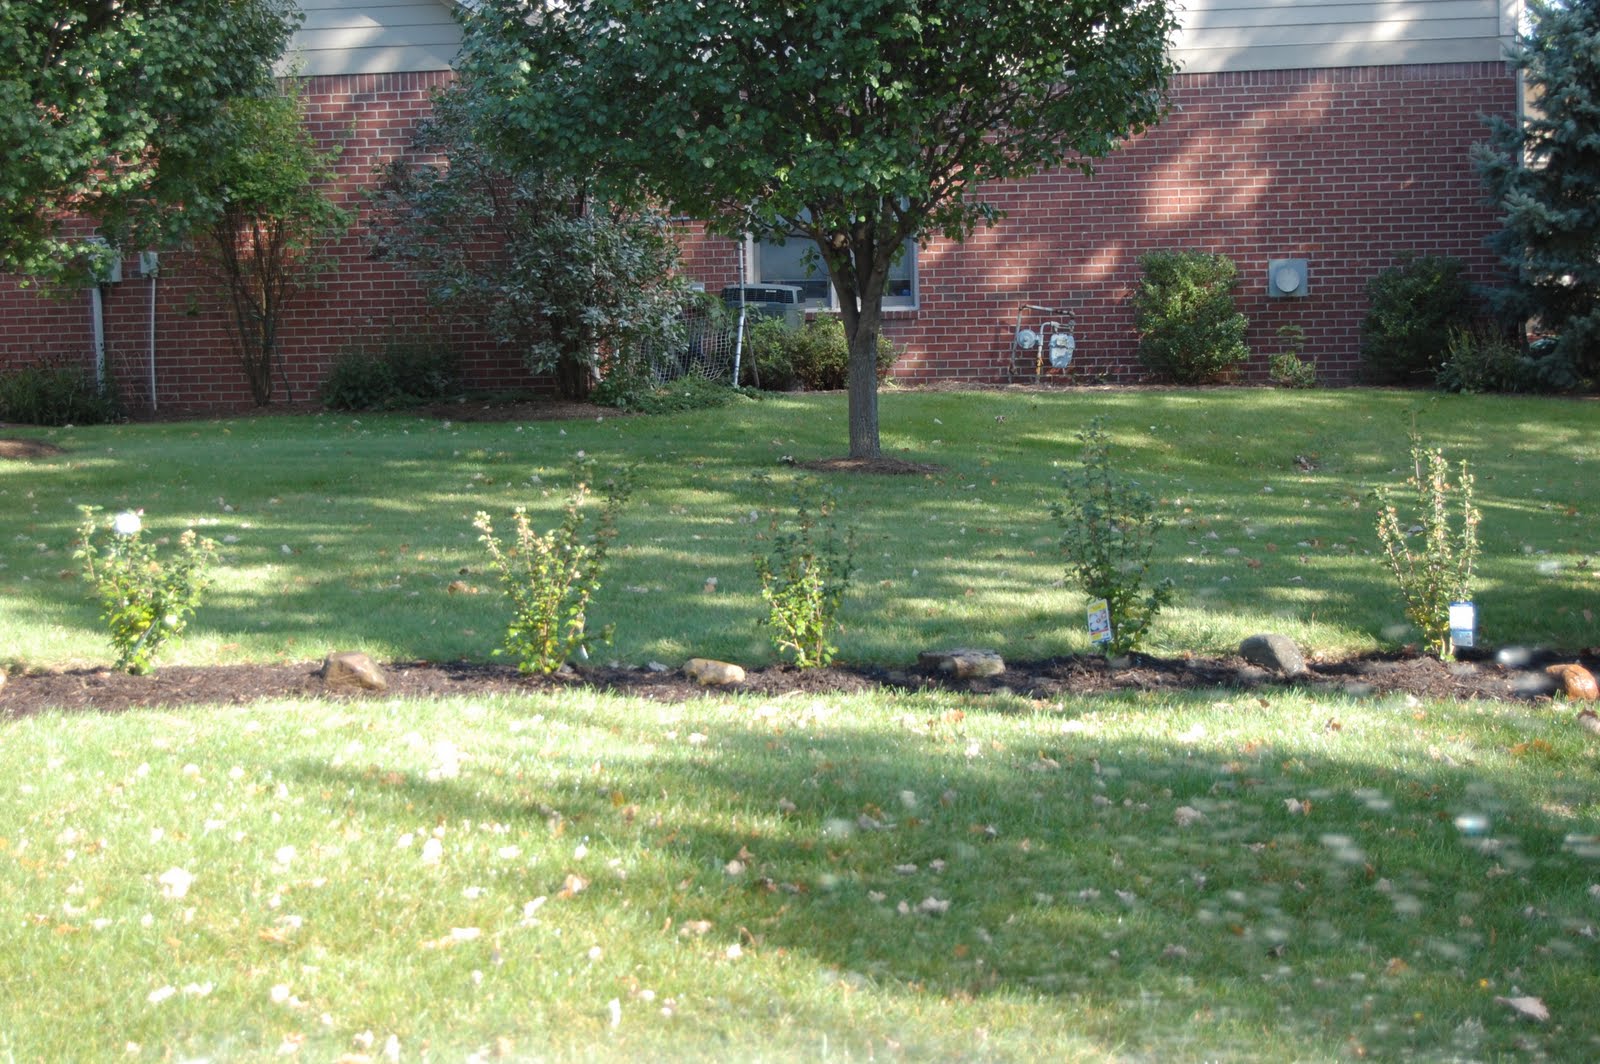
Our major goal during our yard overall is to create spaces that are low maintenance, but lend us plenty of privacy from our neighbors. Our other major goal is to create obstacles so that children on bikes do NOT ride through our yard on their quest to get to the neighborhood pool. You see, the neighborhood pool is caddy corner from our backyard across the street.... Does that make sense? Basically, our backyard butts up to a berm, and on the other side of the berm is a road, and on the other side of that road lies the pool. We have created major obstacles in most places of our yard by planting trees, but there still lies an area where kids ride through near our driveway. Initially, we placed rocks haphazardly, but that did not seem to stop our bike riding friends.


From the pic, it is hard to see the rocks, but if you look really hard, you can see that between the tree on the left, and the bushes on the right, we placed about 8 or 9 rocks.  Very ineffective...... So I stepped up my game, and Lowe's was my partner in crime.  I was checking out the Garden section this week to find that all their bushes were on clearance at 25%.  So I start thinking that perhaps this is the motivation I needed to get my new obstacles in place.  However, the question arises as to which bush to pick.  I decided to go with the Rose of Sharon because there were 5 available in all the same color, they grow super quick, and we have a few of them in other places on the property.  So my decision was made easily, and boy was I happy to find that at the check-out they were actually 50% off..... Yippee!  Below, you can see that I evenly spaced them apart at around 3.5 feet (per instructions on the plants). 

Then, I got my digging on.... Luckily it had just rained, and the soil was very soft making this task so much easier.

Easy peasy!..... Now, I just can't wait until they take off, and fill in.  This bush is super lovely when it is in bloom (see the little bloom below).  I highly recommend it.

Below I have included some Rose of Sharon bushes we currently have planted on the property (they are over 6 feet tall).  As you can see, they have filled in very well, and create quite a bit of privacy. 

If only I could snap my fingers to get the ones I just planted to grow as big as their brothers.  Although, I think my Rose of Sharon is beginning to create the rose of privacy I quest....

Monday, September 21, 2009

Front Yard Renovation: Part II: Plants in the Ground Ready to Grow

I am super pleased with how the front yard turned out. All and all, it was pretty painless having the seven tons of topsoil added in addition to having our front step, and two sidewalk tiles mudjacked back to their rightful spots (due to the settlement issue, our front step had settled about 3 inches below where it should have been). There were a few kinks in the process ie the electrical cord that leads out to our carriage light in the front yard was cut several times which required it to be patched several times which turned into having to replace and  trench a whole new line out to the light. Therefore, this requires a new project of seeding the four inch wide by several feet line of mud trailing through our yard, but all and all it could be worse.

Below is the view from the right side of our property line in front. The oranmental grass did a great job of growing in around the utility boxes.


Here is a closer look at the porch area.  Behind the Japanese Red Maple you will find 'P.J.M'. hybrid rhododendrons which will offer great flowers in the spring.  In front of the Japanese Red Maple we have two types of hydrangeas: mophead and limelight.

The below is a pic of the right side of the house.  Here we have boxwoods, limelight hydrangea, spireas, and several annuals planted.  We also had the landscapers put a flagstone path in to lead to the hose area which allows for easier watering.

Below you can see what the front entry looks like now.  We had a large surplus of decorate rocks all over our property from the previous owners.  We decided to incorporate them into the new design.

This view highlights the area in front of the garage windows.  Again we used some of the extra decorative rocks, boxwoods, crab apple tree (pre-existing), and some annuals. 

Below you can see how the flowerbed near the carriage light has been downsized, and filled with a bluestar mini-bush, a 'P.J.M.. hybrid rhododendron (pre-existing from prior owners), mini-irises (pre-existing), a red ground covering, and rocks. 


Below is the view of the utility boxes by the driveway.  Gone are the dying Junipers, and here to stay are the Yews.  It will take a few years for them to grow in, but it looks so much better already.

View from the driveway. Although it will take a few years for the bushes to grow in, I think the below looks so much better than what we started with in the beginning. All the new plants were a bit high maintenance this year because they needed to be watered almost daily to ensure they become rooted well (we had very little rain all summer and lots of heat once the plants were in the ground).

I love how it all came together. The only thing left to do is to seed the area where the new carriage electric line was installed in the yard. However, before that occurs, we will be aerating first since we have clay soil. Perhaps next year I will have flower boxes installed under the two garage windows on the left.  I think that would be the icing on the cake.

Front Yard Renovation: Part I- Cleaning up and Planning

One thing we did not expect to find the day we closed on our house was an insane amount of overgrown landscaping.  We placed our offer in March when the ground was covered with snow, and therefore, we had no idea what we were getting ourselves into when it came to our yard.  Some homeowners would be pleased to find lots of flowerbeds, but not my husband and I.  We were utterly overwhelmed with what we had going on around the house.  Our first summer in the house we decided to "try" to maintain what we had inherited.  We realized during this trial period that there was just too much going on for us to handle.  Therefore, we decided to downsize a few of the flowerbeds, and turn them into grassy areas.  We also filled in our small pond because it was just too much of a hassle to maintain in our minds (we also saw that down the road it would be a major danger area for children).  At any rate, I did not catalog our first summer nor the changes we made.  However, I have documented most of our  outdoor changes this past summer. 

First up, is the front yard renovations.  Essentially, we started off with lots of overgrown bushes, tress, and ivy.  Our other major issue was that we had some settlement issues, and therefore, we needed to bring in several tons of dirt to bring the grade up around the front of the house.  Therefore, we decided to remove most of the preexisting landscape, and start fresh once the grade was raised around the house.  The following pictures gives you a good look of what we started with in June.  Mind you, on the left side of the house, we had bushes under the windows where it is bare.  We removed those ourselves.  In the right hand corner of this pic you can see the  bed around the utility boxes that we cleaned up ourselves too.  The prior owners had planted a hodge podge of flowers around the box that didn't serve much purpose.  We decided to remove these flowers, and plant ornamental grass which would in turn grow high to cover the boxes.


We also decided to remove the Silver Maple tree from the front due to the extra work the pinwheels they dropped in the spring created, and then all of the leaves it dropped in the fall.  The tree did not serve much purpose, and we thought it would be nice to have more grass in the front yard.  We are more of the evergreen type of people (mind you we had 10 blue spruces planted in the spring so we more than made up for cutting this tree down).


The below view is from the driveway angle.  As you can on the bottom apart of the picture, the flower bed around the lamp post is overgrown with an overwhelming amount of Black Eyed Susans, and just begging to be downsized.


Below you can see the other utility box area that is on our property line with our other neighbor.  The browning Juniper was begging to be replaced with something else.  It just continued to look more and more sickly everyday.


The below pic gives you a better idea of all of the chaos we had going on in the flower beds. We decided to have the weeping cherry tree removed too because the placement would not work with our new design. We strived for clean lines and low maintenance.


As you can see above and below, these pics reflect all the plants removed from the flower beds in the front.  It was such a relief to have these cleaned up.


This picture gives you more appreciation for what a little hard work and lots of digging can do to the appearance of the house.


Now that we had all the beds all cleaned up, and ready to go, now what? Well, after lots of debate, and research, I went over to the nursery to help pick out some of the plants that I wanted to be part of my new design. I just love hydrangeas (I know they are a bit high maintenance, but they are so worth the extra work in my book), and boxwoods so these were absolute must haves. From here, I was  ope to suggestions. Therefore, our landscape architect went to work on his drawing...

.. To Be Continued....