Sunday, January 31, 2010

Revisiting our Dining Room

You might remember how blah our dining room looked before I painted it.  If not, the following is a picture to jog your memory of the "before".
Pictured below is the wall the mirror is placed on pre-mirror.  As you can see, it looks sort of blah.
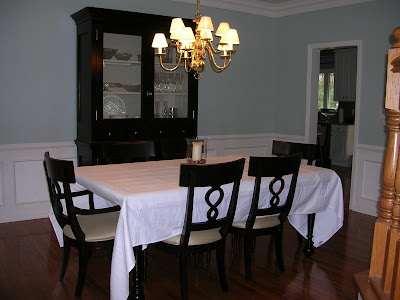
Here is the first after.  This is the view from our foyer area.  I am not thrilled with how the table is decorated, but wanted to share the progress with the newly installed light, mirror, and drapes.
This view is from the corner near the window.
This view is from the corner closest to the kitchen looking into the room.
This view is similar to the view above, but it is from the entryway in the kitchen rather than the corner.
This view is from the corner by the window closer to the entry door.
This below view is from the center of the window.
Closeup of the pendant light.
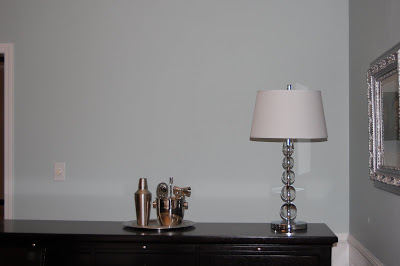
One more view of the mirror and the buffet.  I think this turned out divine.  I love how the pendant is centered in the mirror in the picture.  :)
All and all, I am very pleased with how the dining room is shaping up.  I still need to figure out a few more wall accessories.  I am thinking of hanging some white plates on the wall just to the left of the entryway that leads into the kitchen (see first pic on the left hand side where the wall is blank).  Outside of that, I am not sure if I really need to have items flanking the china cabinet.  I am generally of the thinking "less is more", but am open to suggestions.

Also, let me know how you decorate your table top.  I like having a table cloth on the table most of the time because I like how it protects the table top from dust.  Although, I am thinking of getting ambitious, and doing something else.  Suggestions are always welcomed.

Saturday, January 30, 2010

Foyer fun....

I know this may take some of you by surprise, but we do not have much hanging on our walls in our home.  I am sure some of you may think that this tidbit is a bit unexpected.  2009 was a big year for paint in our home.  The whole first floor was painted between the months of March and November.  I did most of the painting in the early part of the year, and then, I developed some issues with nerves in my right arm (I am right handed) so we had to hire out for the rest of it.  Anyhoo, I developed a bit of a fear with hanging things back on the wall since all the walls were perfectly painted.  Basically, I was fearful of disturbing the paint job (I know this sounds crazy), but it is what it is. 

At any rate, I have decided that 2010 is the year to start showcasing our art and photographs.  The first place I started is in our foyer.  Our house is very open so we do not have a lot of wall space in our foyer.  The blank wall below is the "showcase" wall, and it is the first thing visitors see when they arrive. 
As I mentioned above, I have a bit of a fear of hanging items on the walls at this point. Therefore, I needed to develop a tool that would aid my confidence. I decided that before placing any nails in the wall, I would trace the size of my framed art onto paper. I then used these paper cut-outs to determine the positioning of the art by moving the paper pieces around on the wall (adhering the paper with tape once I thought I was in the right spots). The display I settled on is pictured below.
From here, I measured the positioning of the hanging wire and hardware on the art frames.  I can not recall what each photo needed.  From memory, the first photo had the metal teeth hanger on the top, and the second piece needed the picture hanger to be placed 3.5 inches down from the top of the frame.  Therefore, I found the center, measured down about 3.25 inches since the hanger thing was about 1/4 inch and then nailed the hanger into the wall.
Viola!  I am very happy I got over my fear.  The top picture is a wedding shower gift from some dear friends.  The bottom pic is a drawing we had an artist do for us of our home (you might recognize it from the blog too).  Below is the exact view visitors get from our doorstep (I am working on figuring out what to place over the fireplace... I am thinking a mirror, but that is the "easy" way out).

As the year progresses, I will continue to share with you how I accessorize with wall decor around our home.

Sunday, January 17, 2010

Sidetable Gets Its Groove Back

This is a classic story of giving a good piece of furniture another life with a little bit of elbow grease.  Below you will find a traditional sidetable that has seen better days.  It has great bones, but has been loved a little too hard.  However, it has major potential.  All it needs is a bit of sanding, primer, paint, and poly.
Before:

Mid-procress: Half-Sanded
After:

The sidetable is back to its regal self.  I gave it two coats of primer, three coats of paint, and three very thin coats of poly.  It now has a wonderful home in our guest bedroom.  Perfection!

Making Heirlooms Work for You

My husband and I received an old family picture of his Great-Great Grandparents from Hungary.  It is a wonderful pic, but the gold frame was not working for our home decor.  We struggled with finding a place to hang the picture for months.  Initially, I wanted to preserve everything about this picture.  However, the frame was the frame's golden tone wasn't working, so we just did not have anywhere to display it.  Then, one day I decided to grab a can of silver spray paint, and spray the frame. 

Before:


After:

I am just tickled with our result.  The frame looks great, and now hangs proudly in our dining room for everyone to see.  It is a great conversation starter, and I am so happy we were able to make this heirloom work for our home decor.

Sunday, January 3, 2010

Color Me Beautiful.....

As you can see, I didn't take a “before” pic of the dining room (I got ahead of myself a bit with this project). Below, you will find pics of the blank slate before the paint was applied. This presented me with a great opportunity to make the room my own.


The room had never been painted (just builders paint on the wall which is crazy since the house was built in 1997), but had major potential with the crown molding and the molding boxes on the bottom of the walls.
                            
You may notice that the white color inside of the molding boxes looks a shade different from the surrounding moldings. I had recently painted the inside of the boxes white (they had been a dark khaki color). I used the same color white the molding had been painted, but since it had been painted a few years ago, they read a bit different for a few months. Now, they blend in just fine.
     
The color I selected was Woodlawn Blue by Benjamin Moore in an eggshell finish. I just love a Robin's egg color with dark wood. The china cabinet, table and chairs have an expresso finish.
 
I absolutely love how it turned out!

Now all I need to do is replace that fugly brass chandelier. I have the below oversized equator pendant ready to install from CB2. It is quite a steal at only $199 compared to other pendant lights I found.
                                          
So what do you think?

Friday, January 1, 2010

Maintenance Free

Today I was reminenscing a bit about all the yard projects we completed this past summer around our casa with a few friends.  Upon recalling all the hardwork, I realized I never posted about one of our major backbreaking projects.  So here we go.... try to remember what warm weather feels like, and let's talk about creating an almost maintenance free space.

As you can see below, we had a very large flowerbed on the southside of our house by our driveway that was filled to the brim with numerous perennials.  This bed provided many beautiful flowers, but it also provided lots of soil for numerous weeds to grow.  Almost every other day, I was going outside to weed which is not a fun task when you are allegeric to almost everything outdoors.

Therefore, in an effort to create more maintenance free spaces on our property, my husband and I dug up all the plants in the above space.  We have a little bit of nice topsoil with lots of clay soil underneath, so we waited to complete the removal process until we had a few days of rain.  This was a great idea because our shovels cut through the soil much like a knife cuts through hot butter.  It was pure magic, and made the process go so much quicker.  It took about 3 hours to dig all those flowers up, but we got it done.
                            
We then picked out all the rocks we could find in the soil.  Initially we were going to try to seed the area rather than using sod, but after having seeded so many areas of our yard this year, we opted for sod (instant gradification was needed).  We then decided that since we removed all the plants ourselves (and also because I am allergic to grass) that we would contract out for the sod.  Therefore, our contractors rototilled the soil to prepare for the sod, and then sodded it on our behalf.

After lots of water (water is super important to sod rooting; I can't emphasis it enough), we are happy to report that our sod rooted well to the ground, and for the most part, blends in well with the surrounding grass.  We are super excited to have one less area to weed next summer which will provide more time for enjoying fun warm weather activities.

I definitely think the grass is greener on our side of the property line. :)